In this guide (7 sections)
- Tripod center column up or down for landscapes – the short answer
- Why a raised center column costs sharpness
- When to raise the center column and when to keep it down
- Going low – when the column is the problem
- If your tripod is too short without the column
- Do you need a tripod without a center column?
- Questions photographers ask
We earn a commission if you buy through links on this page, at no extra cost to you. It never changes what we recommend. How we make money.
The short answer
- Default to down. Extend the legs first and raise the center column last, only a few inches, to fine-tune the composition.
- Keep it fully down for long exposures, wind, heavy lenses and anything where the camera has to sit still for seconds.
- If you need more than about six inches of column, extend the legs instead; if the legs are maxed out, shoot faster and use a self-timer.
- For low foreground shots the column is the obstacle: swap to a short column, turn it horizontal or reverse it, or use legs with no column.
You frame a sunrise on a ridge, the viewfinder sits two inches too low, and the quickest fix is the knob on the center column. For landscapes, keep the tripod center column down by default: extend the tripod legs first, then raise the center column only a few inches to fine-tune the composition. Keep it fully down for any long exposure, wind or heavy lens, and get it out of the way when you want the camera low to the ground.
Tripod center column up or down for landscapes – the short answer
Down, with one exception: a few inches of column for framing is fine in calm air with a fast shutter or a hands-free release.
Most top results agree: legs first, column last. NYC Photo Safari, which defends the column, draws the line at about six inches; past that, extend the legs. We use that six-inch rule as our ceiling for landscape work and drop to zero when any “keep it down” condition below applies.
Why a raised center column costs sharpness
A raised column lifts the camera away from the apex where the legs meet, so it works as a lever: the same gust or shutter press creates more torque, and the vibration lasts longer.
Tester The Center Column measured this. Fitting a column at all cost the RRS TVC-23 roughly 15% of its stiffness, and a light RRS Ascend-14 lost about half at full extension. On a Benro with a medium-format body, damping suffered: vibrations decayed four times slower with the column fully up, taking about five seconds to settle.
A recurring r/AskPhotography complaint reads: “The extended center column just serves to amplify and prolong the vibrations you introduced by tripping the shutter” (thread).
When to raise the center column and when to keep it down
It depends on what pushes on the camera (wind, your finger) and how long it must stay still.
The tester’s summary: a heavy camera or wind can each be tolerated on a raised column, but not both together. We turned that into common landscape situations.
| Landscape situation | Column | Why |
|---|---|---|
| Calm air, 1/60 s or faster, light mirrorless kit | Up a few inches is fine | Little force, short exposure |
| Blue hour, ND filter or star trails | Center column down | Any sway is recorded for seconds or minutes |
| Wind on a ridge or coast | Down, legs lower | The camera acts like a sail on a lever |
| Telephoto landscape (70-200mm and up) | Down | Heavier load magnifies sway |
| Eye level needs more than about six inches | Extend legs instead | Legs keep the camera near the apex |
Either way, we fire with a self-timer or remote release. Our post on tripod shake when pressing the shutter covers delay settings, and the wind fixes guide covers gusts.
From our notes: Picture a landscape shooter on a coastal headland with a full-frame body and a 24-70mm, planning a 2-second exposure of waves at dusk. The legs are at full height and the horizon still sits low in the frame, so the column goes up a hand’s width. In calm air that works. Then the evening breeze picks up. When we read through the forum threads for this guide, the advice that cost nothing kept coming back: lower the column, accept a lower viewpoint, and keep the tripod tight to the ground.
Going low – when the column is the problem
For wide-angle shots with a strong foreground, the column limits how low the camera goes, so “down” is not low enough.
Landscape educator Tim Shields recommends “the shortest center column possible” because the column sets minimum height. A Backcountry Gallery member agrees: “a center column definitely gets in the way when you want to get the camera as low as possible” (thread). Here are four fixes we see:
- Short center column. “Many tripods come with an additional short centre column for those low down shots” (Talk Photography).
- Horizontal column. Some Manfrotto and Gitzo columns swing 90 degrees so the legs can open to their widest leg angle.
- Reversible column. The camera hangs under the apex; one owner notes the screen is awkward to reach between the legs.
- No column. A systematic tripod takes a column only as an accessory.
If your tripod is too short without the column
When the legs are maxed out, the column is the only way to eye level, so use it and compensate rather than stooping.
One hiker on DPReview writes, “I avoid using the center post when possible but in a travel pod thats even more important” (thread), and the same thread warns that short travel tripods mean bending over. The column adds 12 to 18 inches, so we compensate:
- Shoot about half a stop faster (a Backcountry Gallery tip).
- Use a self-timer and wait for lulls in the wind.
- Hang weight from the tripod hook within the load rating, ideally a bag resting on the ground.
- Shoot a little lower; we find most landscapes do not need exact eye level.
Our tripod height chart shows the height without center column to look for next time.
Do you need a tripod without a center column?
Not necessarily; a tripod with a column you rarely raise suits most landscape shooters, as long as its legs alone reach near eye level.
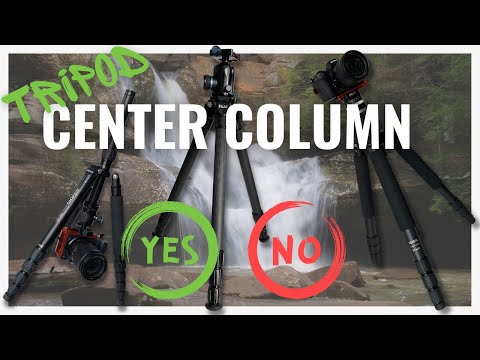
DPReview regulars split: one shooter with a 35-year career keeps the column “just in case,” while columnless owners praise the stiffness. Our view is that legs-only height matters more than whether a column exists. The video we picked below, from landscape photographer Jeffrey Tadlock, walks through the same tradeoff. Shopping? Our landscape photography tripod picks compare legs-only and minimum height, and the tall photographer picks keep the column down above six feet.
Questions photographers ask
Should the tripod center column be up or down for landscapes?
Down by default. Extend the legs first and use the center column only for the last few inches of framing, and keep it fully down for long exposures, wind or a heavy lens.
Is it bad to extend the center column on a tripod?
Not always. A short lift in calm air with a fast shutter or a self-timer rarely shows. A fully raised column turns the camera into a weight on a lever, so vibrations grow and take longer to die out.
Are tripods without a center column better for landscapes?
They are stiffer and usually go lower, which suits long exposures and foreground-heavy compositions. The tradeoff is no quick height tweak, so buy legs that reach eye level on their own.
How do I get low to the ground if the center column is in the way?
Swap in a short column if your tripod came with one, swing the column horizontal, reverse it to hang the camera under the apex, or remove it on a tripod that allows that.
Does hanging a bag from the center column hook help?
It can damp vibration if the bag rests on the ground or hangs still. Keep the total within the tripod's load rating, and avoid a bag that swings in the wind.
Why you can trust this guide
- Products are checked against manufacturer specifications, user manuals and long-term owner reports.
- Each pick is scored on the Best Tripod Score: stability, portability (weight and folded length), working height, build quality and value. Scores come from published specs and owner reports, not hands-on testing.
- We never accept payment for placement. Affiliate commissions do not affect rankings.
Last reviewed . Read our research process and editorial policy, or report an error.
Sources
- Why Center Columns Reduce Tripod Stability (The Center Column)
- Why You Need Your Tripod's Center Column (NYC Photo Safari)
- Tripods: Center column vs. no center column? (DPReview Forums)
- Tripod/Center Column (Backcountry Gallery Photography Forums)
- Tripod center column (Talk Photography)
- How to Choose the Best Tripod for Landscape Photography (Tim Shields)
- Why is my lens wobbling so bad on a tripod? (r/AskPhotography)
- Lightest tripod for hiking? (DPReview Forums)

Best Tripod Editorial Team
Research & editorial
We research tripods, monopods and heads for photographers and video creators: real working height with and without the center column, load capacity against the gear you actually shoot, packed length for a carry-on, leg-lock speed and Arca-Swiss compatibility. Every guide follows our published research process and editorial policy.